Category: Blog

  • MemoCast.com Login Guide: Sign-In Steps and Troubleshooting Tips

    MemoCast.com Login Guide: Sign-In Steps and Troubleshooting Tips

    Accessing an online account should be straightforward, but login problems can interrupt your work, viewing, messaging, or account management tasks. This guide explains how to sign in to MemoCast.com in a careful, security-conscious way and how to troubleshoot the most common issues that may prevent access. The recommendations below are written to help users avoid mistakes, protect their credentials, and resolve problems without taking unnecessary risks.

    TLDR: To log in to MemoCast.com, go to the official website, select the sign-in option, enter your registered email or username and password, then complete any verification step if prompted. If you cannot sign in, check your password, browser, internet connection, and account status before attempting multiple retries. Use the official password reset process if needed, and avoid entering your login details on suspicious pages or links from unsolicited messages.

    Understanding the MemoCast.com Login Process

    The login process for most online platforms is designed to confirm that you are the rightful account holder. MemoCast.com will generally require identifying information, such as an email address, username, or phone number, along with your password. Some users may also be asked to complete an additional security step, such as entering a code sent by email or using another form of verification.

    Before signing in, make sure you are using a secure network and a trusted device. Public Wi-Fi, shared computers, and unknown browser extensions can increase the risk of account compromise. If you must use a public connection, avoid saving your password in the browser and sign out fully when you are finished.

    Step-by-Step MemoCast.com Sign-In Instructions

    Follow these steps to access your MemoCast.com account safely:

    1. Open a trusted browser. Use an updated browser such as Chrome, Firefox, Safari, or Edge. Keeping your browser current helps protect you from known security vulnerabilities.
    2. Go to the official MemoCast.com website. Type the address directly into the browser’s address bar instead of clicking unknown links. This helps reduce the risk of phishing websites that imitate legitimate login pages.
    3. Find the login or sign-in button. It is usually located near the top-right corner of a website, though the exact placement may vary depending on the site layout.
    4. Enter your account identifier. Provide the email address, username, or other credential associated with your MemoCast.com account.
    5. Enter your password carefully. Passwords are case-sensitive, so check your capitalization and keyboard layout before submitting.
    6. Complete additional verification if required. If MemoCast.com uses two-factor authentication, enter the code or approve the login request using the method connected to your account.
    7. Select sign in. Once your details are entered, submit the form and wait for the account dashboard or home page to load.

    If the login succeeds, review your account briefly to make sure everything looks normal. If you see unfamiliar activity, changed settings, or messages you did not create, update your password immediately and check the account’s security options.

    Important Security Checks Before Logging In

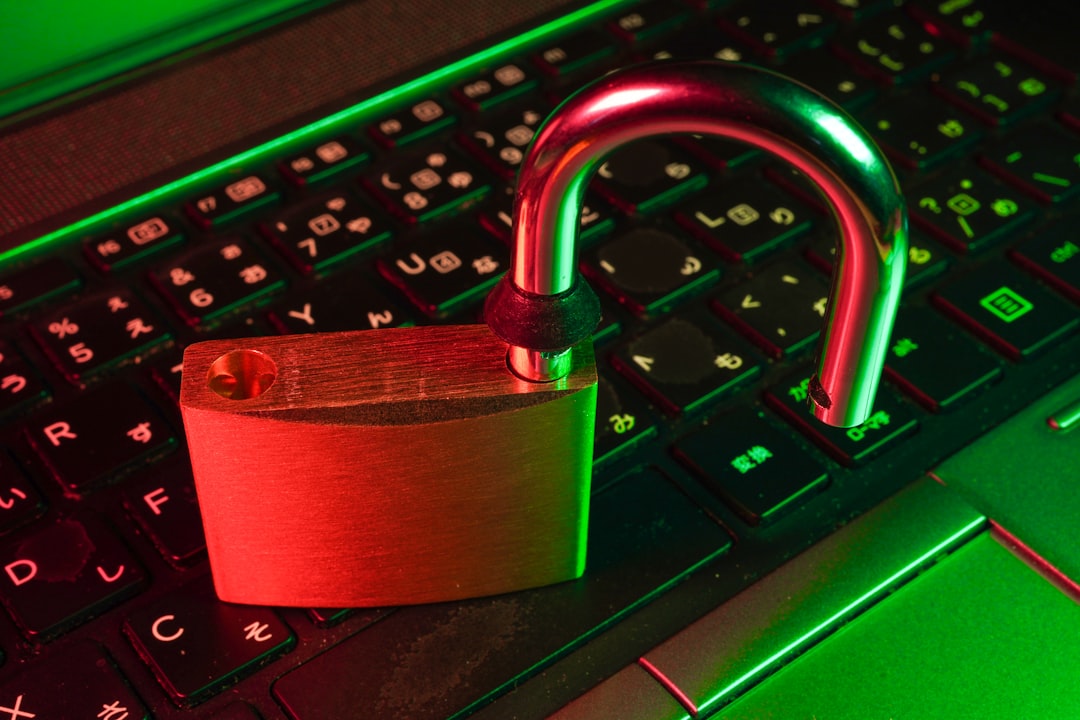
    Because login pages handle sensitive information, it is important to confirm that the page is legitimate before entering your credentials. A trustworthy login session should begin with https:// in the browser address bar. Many browsers also display a lock icon, though this should not be your only check. A secure connection means traffic is encrypted, but it does not automatically prove that the website is genuine.

    Be cautious if you notice unusual spelling in the web address, unexpected pop-ups, urgent warnings, or requests for information that the service normally would not need. For example, a standard login page should not ask for your full payment details, government identification number, or complete security answers unless there is a clear and legitimate reason.

    • Do not enter passwords through links in suspicious emails.
    • Avoid signing in on devices you do not control.
    • Use a strong, unique password for MemoCast.com.
    • Enable two-factor authentication if available.
    • Sign out after using shared or public computers.

    What to Do If You Forgot Your Password

    If you cannot remember your password, use the official password recovery process. On the MemoCast.com login page, look for a link such as Forgot password?, Reset password, or Need help signing in?. Select it and follow the instructions provided.

    Typically, password recovery involves entering the email address or username associated with your account. MemoCast.com may then send a reset link or verification code. Check your inbox carefully, including the spam or junk folder, if the message does not arrive within a few minutes.

    When creating a new password, choose one that is difficult to guess. A secure password should be long, unique, and not reused on other websites. Consider using a reputable password manager to generate and store your passwords securely.

    Avoid simple passwords such as names, birthdays, repeated numbers, or words connected to your public profile. If someone gains access to one of your other accounts and you reuse the same password, they may attempt to use it on MemoCast.com as well.

    Troubleshooting Common Login Problems

    Login issues can happen for many reasons. Some are caused by incorrect credentials, while others involve browser settings, connectivity, account restrictions, or temporary service problems. The following troubleshooting steps can help you identify the cause.

    1. Check Your Username or Email Address

    Make sure you are using the exact email address or username linked to your MemoCast.com account. If you have several email addresses, try the one you used when registering. Look for older messages from MemoCast.com in your inbox, as they may confirm which email address is associated with the account.

    2. Verify Your Password

    Passwords can fail because of small typing errors. Check whether Caps Lock is enabled, whether your keyboard language has changed, or whether a mobile device has inserted an unwanted space. If you copied and pasted your password, make sure there are no extra characters before or after it.

    3. Clear Browser Cache and Cookies

    Old cookies or corrupted browser data can sometimes interfere with login sessions. Clear your browser cache and cookies, then restart the browser and try again. Keep in mind that deleting cookies may sign you out of other websites, so be prepared to log back in where necessary.

    4. Try a Different Browser or Device

    If MemoCast.com does not load correctly, try another browser or device. This can help determine whether the issue is related to your current browser configuration. Disable unnecessary extensions temporarily, especially ad blockers, script blockers, privacy add-ons, or security extensions that may be interfering with the sign-in page.

    5. Check Your Internet Connection

    A weak or unstable connection can prevent login pages from loading or submitting properly. Restart your router if needed, switch networks, or test another website to confirm that your internet connection is working. On mobile devices, try switching between Wi-Fi and mobile data.

    6. Look for Service Outages

    If you are confident that your login details are correct but the website will not respond, MemoCast.com may be experiencing a temporary outage or maintenance period. Wait a few minutes and try again. If there is an official status page, help center, or support channel, check it for announcements.

    7. Review Account Lock or Security Restrictions

    Multiple unsuccessful login attempts may trigger temporary security restrictions. This is usually intended to protect accounts from automated guessing attacks. If your account appears locked, pause before trying again. Repeated attempts may extend the lockout period. Use the recovery option or contact official support if the account does not unlock after the stated period.

    Two-Factor Authentication and Verification Issues

    If MemoCast.com uses two-factor authentication, you may need to enter a code sent to your email, phone, or authenticator app. If the code does not arrive, wait briefly and then request a new one. Avoid requesting too many codes at once, because this can make it confusing to know which code is valid.

    If you use an authenticator app, confirm that your device time is set automatically. Time mismatches can cause authentication codes to fail. If your verification method is no longer available because you changed phone numbers or lost access to an email account, you may need to use backup codes or contact MemoCast.com support through official channels.

    How to Protect Your MemoCast.com Account

    Good account security is not only about signing in successfully. It is also about reducing the chance that someone else can sign in without permission. After accessing your account, review your security settings and update any outdated recovery information. Make sure your recovery email and phone number, if used, are current and accessible.

    • Use a password manager: It can help you create unique passwords and avoid reusing credentials.
    • Enable login alerts: If available, alerts can notify you when your account is accessed from a new device.
    • Review active sessions: Sign out of devices you no longer use or do not recognize.
    • Update recovery information: Keep your email address and phone number current.
    • Be alert for phishing: Treat unexpected messages asking you to “verify” your account with caution.

    What If MemoCast.com Login Still Does Not Work?

    If you have tried the steps above and still cannot sign in, gather relevant information before contacting support. This may include the email address associated with the account, the approximate time the problem started, the browser and device you are using, and any error message shown on the screen. Do not send your password to support staff. A legitimate support team should never ask for your password.

    When contacting support, use only official contact methods provided on MemoCast.com. Avoid phone numbers, email addresses, or chat links found in random search results, forums, or social media comments unless you can verify that they are official. Scammers often create fake support channels to collect login details or payment information.

    Common Error Messages and What They May Mean

    Although exact wording can vary, several login messages tend to have similar meanings:

    • “Invalid username or password”: The entered credentials do not match the account records. Recheck spelling or use password reset.
    • “Account temporarily locked”: Too many failed attempts or unusual activity may have triggered a security hold.
    • “Verification required”: Additional confirmation is needed before access is granted.
    • “Session expired”: The login page may have been open too long. Refresh the page and try again.
    • “Something went wrong”: This may indicate a temporary technical issue, browser conflict, or server-side problem.

    Final Recommendations

    Signing in to MemoCast.com should be a simple process when your credentials, browser, and account settings are in good order. Start by confirming that you are on the official site, enter your registered login details carefully, and complete any security verification requested. If problems occur, work through the likely causes step by step instead of repeatedly guessing passwords.

    For long-term safety, use a strong unique password, keep your recovery information updated, and be cautious with links that claim to lead to the login page. If the account contains important personal or professional information, take security settings seriously and review them regularly. A careful approach protects both your access and the integrity of your MemoCast.com account.

  • SaveDay Login Help: Accessing Your Account and Resolving Issues

    SaveDay Login Help: Accessing Your Account and Resolving Issues

    Logging in should be the simplest part of managing your money, but even a small access problem can feel stressful when you need to check balances, review contributions, update beneficiaries, or view retirement plan details. Whether you are using SaveDay through an employer-sponsored plan or as part of your personal savings routine, understanding how the login process works can help you get into your account faster and solve common issues with less frustration.

    TLDR: To access your SaveDay account, use the official SaveDay website or app, enter your registered email or username, and complete any required security verification. If you cannot log in, start by resetting your password, checking your internet browser, and confirming that your account information is correct. For persistent issues such as locked accounts, missing verification codes, or employer plan access problems, contact SaveDay support or your plan administrator.

    Understanding the SaveDay Login Process

    The SaveDay login process is designed to protect sensitive financial information while still giving users convenient access to their accounts. Most users will sign in with an email address, username, or credentials created during account setup. Depending on your account settings, you may also be asked to complete multi-factor authentication, sometimes called MFA, which adds an extra layer of security by requiring a code sent to your phone or email.

    If you access SaveDay through your employer, your account may be connected to your workplace retirement plan. In that case, your login access might depend on information provided by your employer, such as your name, date of birth, Social Security number, employee ID, or plan enrollment details. This is why a login issue is not always just a forgotten password. Sometimes it can involve incomplete registration, outdated employer records, or a mismatch between your personal details and the information on file.

    The good news: most SaveDay login problems are fixable with a few practical steps. Before assuming something is wrong with your account, it helps to walk through the basics carefully.

    Image not found in postmeta

    How to Log In to Your SaveDay Account

    To access your account, begin by navigating to the official SaveDay login page. If you use a mobile device, open the official SaveDay app if one is available for your account type. Avoid clicking login links from suspicious emails, text messages, or search ads that do not look trustworthy. Since financial accounts contain private data, it is important to make sure you are using the legitimate platform.

    Once you are on the login page, follow these general steps:

    1. Enter your username or email address. Use the same email you used when registering your SaveDay account.
    2. Enter your password. Passwords are usually case-sensitive, so check capitalization carefully.
    3. Complete identity verification if prompted. This may involve a one-time code sent to your phone or email.
    4. Review your dashboard. After signing in, you may see account balances, plan details, contributions, investment options, documents, or profile settings.

    If it is your first time logging in, look for an option such as Register, Create Account, Set Up Online Access, or First Time User. You may need to verify your identity before creating your username and password. Have your personal information ready, but only enter it on the official SaveDay site or app.

    What to Do If You Forgot Your Password

    A forgotten password is one of the most common login issues. The fastest fix is usually the Forgot Password option on the login page. Click it and follow the instructions. You will likely be asked to enter your registered email address or username, then verify your identity through a code, security question, or email link.

    When creating a new password, choose one that is strong but memorable. A good password should include:

    • At least 12 characters, if allowed
    • A mix of uppercase and lowercase letters
    • Numbers and special characters
    • No obvious personal details, such as your name, birthday, or company name
    • No reused passwords from other accounts

    If you use a password manager, update the saved password immediately after resetting it. Many login failures happen because a browser or password manager keeps auto-filling an old password. If your new password works when you type it manually but fails when auto-filled, the stored password is probably outdated.

    If Your SaveDay Account Is Locked

    SaveDay may temporarily lock your account after too many failed login attempts. This is a security feature meant to prevent unauthorized access. While it can be inconvenient, it protects your financial information from password guessing and automated attacks.

    If your account is locked, wait for the stated lockout period if one is shown. Some systems automatically unlock after several minutes, while others require a password reset or support assistance. If you see a message saying your account has been disabled, suspended, or requires administrator help, contact SaveDay customer support or your employer’s benefits administrator.

    When contacting support, be ready to verify your identity. You may need to provide your name, email address, phone number, employer name, or other identifying information. For your safety, never share your full password with anyone. A legitimate support representative should not ask for it.

    Not Receiving a Verification Code?

    Multi-factor authentication is excellent for security, but it can become frustrating if the verification code does not arrive. If you are waiting for a SaveDay login code, first check whether it was sent by email, text message, or authenticator app. Then try the following:

    • Check your spam or junk folder. Automated security emails sometimes get filtered.
    • Confirm your phone has service. Text messages may be delayed if your signal is weak.
    • Wait a few minutes before requesting another code. Multiple requests can cause confusion because older codes may expire.
    • Check your blocked senders list. You may have accidentally blocked automated messages.
    • Make sure your contact information is current. If your phone number or email changed, you may need support to update it.

    If you recently changed phones, phone numbers, or email accounts, login verification may fail because SaveDay is still sending codes to your old contact method. In that situation, support will likely need to help confirm your identity and update your account profile.

    Image not found in postmeta

    Browser and Device Troubleshooting

    Sometimes the issue is not your account at all. It may be your browser, device, network, or stored website data. If the login page will not load, keeps refreshing, shows an error message, or freezes after you enter your credentials, try a few technical fixes.

    Start with these simple steps:

    • Refresh the page and try again.
    • Close the browser completely, then reopen it.
    • Clear your browser cache and cookies.
    • Try a private or incognito window.
    • Use a different browser, such as Chrome, Safari, Firefox, or Edge.
    • Disable browser extensions that may block scripts, cookies, or popups.
    • Try logging in from another device.
    • Switch from WiFi to mobile data, or from mobile data to WiFi.

    Financial websites often require cookies and secure scripts to function properly. If your browser blocks them aggressively, the login page may not work as expected. Similarly, workplace networks, VPNs, and public WiFi can sometimes interfere with secure connections. If you are using a VPN and keep getting login errors, try turning it off temporarily while accessing your account from a trusted network.

    First Time User Problems

    If you are new to SaveDay, you may run into issues during registration rather than login. For example, the system may not recognize your personal information, or it may say an account already exists. This can happen if your employer has not yet transmitted your eligibility data, if your information was entered differently in payroll records, or if you previously created an account and forgot about it.

    Double-check that your name, birth date, and other details match official records. If you recently joined a company, there may be a delay before your retirement plan data becomes available. If your employer offers SaveDay as a benefit, your human resources or benefits team may be able to confirm when you become eligible and whether your information has been sent to the plan provider.

    Keeping Your SaveDay Account Secure

    Once you regain access, take a few minutes to strengthen your account security. This is especially important for retirement and savings accounts because they may contain long-term financial assets and personal identity information.

    Use these best practices:

    • Enable multi-factor authentication if it is available.
    • Use a unique password that you do not use for email, banking, or shopping accounts.
    • Keep your email and phone number updated so you can receive alerts and verification codes.
    • Review account activity periodically for unfamiliar changes.
    • Log out after each session, especially on shared or public devices.
    • Avoid public WiFi when accessing financial information unless you are using a secure connection.

    Also be alert for phishing attempts. A fake message may claim there is a problem with your SaveDay account and urge you to click a link immediately. Instead of clicking, go directly to the official site or app. Look for signs of fraud such as misspelled words, odd sender addresses, urgent threats, or requests for your password.

    When to Contact SaveDay Support

    Many users can resolve login problems on their own, but some situations require help. Contact support if you experience any of the following:

    • Your account remains locked after waiting or resetting your password.
    • You no longer have access to your verification email or phone number.
    • Your personal details are not recognized during registration.
    • You suspect unauthorized access or suspicious activity.
    • Your employer plan is missing or does not appear correctly.
    • The website or app shows repeated technical errors.

    Before reaching out, gather helpful information such as the error message you see, the device and browser you are using, the approximate time the issue occurred, and whether you have already tried resetting your password. Clear details can help support diagnose the problem more quickly.

    Image not found in postmeta

    Final Tips for Easier Access

    A smooth SaveDay login experience depends on a mix of accurate information, updated security settings, and a reliable device. Bookmark the official login page, keep your password manager current, and update your contact details whenever your email or phone number changes. If your account is connected to your workplace, pay attention to enrollment notices and benefits communications so you know when access should become available.

    Most importantly, treat login problems as solvable rather than alarming. A failed sign-in does not always mean something is wrong with your savings or plan. In many cases, it is simply a password issue, expired verification code, outdated browser data, or registration mismatch. By following a step-by-step approach, you can usually restore access quickly and get back to what matters: monitoring your savings, planning your future, and making informed financial decisions with confidence.

  • How to Set Up ConvertKit Zoom Integration for Webinar Automation

    How to Set Up ConvertKit Zoom Integration for Webinar Automation

    Webinars are most effective when registration, reminders, attendance tracking, and post-event follow-up happen without manual intervention. Connecting ConvertKit with Zoom allows you to build a dependable webinar system that captures registrants, sends targeted emails, segments attendees, and supports sales or educational follow-up after the session ends.

    TLDR: To set up ConvertKit Zoom integration for webinar automation, create your Zoom webinar, prepare your ConvertKit forms, tags, and email sequences, then connect both platforms using a native integration if available or a trusted automation tool such as Zapier or Make. The core workflow is simple: when someone registers in ConvertKit, they are added to Zoom; when Zoom records attendance data, ConvertKit applies the right tags and sends follow-up emails. Test every trigger carefully before promoting the webinar to ensure registrants receive the correct confirmation, reminder, and replay messages.

    Why Integrate ConvertKit and Zoom?

    Running a webinar manually can quickly become inefficient. You may need to copy registrant details from one system to another, send calendar links, track who attended, and follow up with different messages depending on behavior. A properly configured integration removes much of that operational burden.

    With a ConvertKit Zoom integration, you can automate critical parts of the webinar journey, including:

    • Registration collection: Use ConvertKit forms or landing pages to collect names, email addresses, and consent.
    • Zoom registration: Automatically add subscribers to a specific Zoom webinar or meeting.
    • Email reminders: Send scheduled reminders from ConvertKit before the event.
    • Segmentation: Tag people based on registration, attendance, absence, or engagement.
    • Follow-up campaigns: Send replay links, sales offers, resources, or feedback requests automatically.

    This setup is particularly useful for creators, consultants, coaches, software companies, educators, and professional service firms that rely on webinars to educate audiences or generate qualified leads.

    Before You Begin: What You Need

    Before building the integration, confirm that you have the right accounts, permissions, and assets in place. This prevents errors later and helps you build the automation on a stable foundation.

    • A ConvertKit account: You will need access to forms, landing pages, tags, broadcasts, and visual automations.
    • A Zoom account: For larger or more formal events, a Zoom Webinars plan is recommended. Zoom Meetings may be sufficient for smaller sessions.
    • An automation connector: If there is no direct native integration available for your specific workflow, use Zapier, Make, or another reputable automation platform.
    • A webinar title and date: Your automation should point to a specific Zoom event.
    • Email copy: Prepare confirmation, reminder, attendance, replay, and no-show messages.
    • Privacy and consent language: Make sure registrants understand how their information will be used.

    Important: Always check the current capabilities of ConvertKit, Zoom, and your automation provider, as available triggers and actions can change over time.

    Image not found in postmeta

    Step 1: Create Your Zoom Webinar or Meeting

    Start inside Zoom. Create the webinar or meeting you want people to register for. If you are using Zoom Webinars, you can enable registration, customize registration questions, and access attendee reports after the event. These features are valuable for automation because they provide structured data that can be passed back into ConvertKit.

    When setting up the Zoom event, review these settings carefully:

    • Date and time: Confirm the time zone and verify that it matches your promotional emails.
    • Registration requirement: Enable registration if you want Zoom to generate unique join links for attendees.
    • Approval type: Automatic approval is usually best for marketing webinars because it reduces friction.
    • Recording: Enable cloud recording if you plan to send a replay after the webinar.
    • Reminder emails: Decide whether Zoom or ConvertKit will send reminders. Avoid sending duplicate reminders unless intentional.

    In many webinar funnels, ConvertKit handles most email communication because it gives you better control over segmentation, branding, and follow-up logic. Zoom is primarily used to host the live event, generate join links, and report attendance.

    Step 2: Create a ConvertKit Form or Landing Page

    Next, create the registration point in ConvertKit. This can be a form embedded on your website or a full ConvertKit landing page. The form should collect only the information you actually need. In most cases, first name and email address are enough.

    Use a clear headline and description that state what the webinar is about, when it takes place, and what attendees will learn. A serious, trustworthy registration page should avoid exaggerated claims and focus on practical outcomes.

    Your registration page should include:

    • Webinar title: Make it specific and benefit-oriented.
    • Date and time: Include the time zone prominently.
    • Presenter information: Briefly establish credibility.
    • What attendees will learn: Use bullet points for clarity.
    • Consent statement: Explain that registrants will receive webinar-related emails.

    After creating the form, configure what happens when someone subscribes. At minimum, apply a tag such as Registered for Webinar. This tag will become the foundation for your ConvertKit automation.

    Step 3: Prepare Tags and Segments in ConvertKit

    Tags allow you to organize subscribers and trigger specific automations. For webinar automation, it is best to create a clean tag structure before connecting Zoom.

    Common webinar tags include:

    • Webinar Registered: Applied when someone signs up.
    • Webinar Attended: Applied when Zoom confirms live attendance.
    • Webinar No Show: Applied when someone registered but did not attend.
    • Webinar Replay Sent: Applied after the replay email is delivered.
    • Webinar Offer Clicked: Applied when a subscriber clicks a sales or consultation link.

    Use consistent naming conventions. For example, include the webinar name and date in the tag if you run multiple events: Webinar Registered April Strategy Session. This reduces confusion later when reviewing reports or building follow-up campaigns.

    Step 4: Connect ConvertKit and Zoom

    The exact connection method depends on the tools available in your account. If a direct integration supports your desired workflow, follow the platform instructions and authorize both accounts. However, many webinar automation setups use a connector such as Zapier or Make because these tools provide flexible triggers and actions.

    A standard automation usually works like this:

    1. Trigger: A subscriber is added to a ConvertKit form or receives the Webinar Registered tag.
    2. Action: The subscriber is created as a registrant in the selected Zoom webinar.
    3. Action: Zoom returns a unique join link, if supported by the automation tool.
    4. Action: The subscriber is updated in ConvertKit, potentially with a custom field containing the join link.

    If your connector supports storing the Zoom join URL in ConvertKit, create a custom field such as Zoom Join Link. You can then insert that field into confirmation and reminder emails. If that is not available, you may need to rely on Zoom’s own confirmation email, or use a general link when appropriate.

    Image not found in postmeta

    Step 5: Build the Confirmation and Reminder Sequence

    Once the registration connection is working, create an email sequence in ConvertKit. This sequence should reassure the registrant that their place is confirmed and explain what to expect next.

    A typical webinar email sequence may include:

    • Immediate confirmation: Sent as soon as the person registers. Include the date, time, topic, and join instructions.
    • One day reminder: Summarize the main benefit of attending live.
    • One hour reminder: Provide the join link and encourage attendees to arrive a few minutes early.
    • Starting soon reminder: Optional, but useful for high-value webinars.

    Keep the tone professional. Avoid excessive urgency or manipulative language. A good reminder email should be concise, useful, and easy to act on. If you include a unique Zoom join link, test personalization carefully to ensure the field populates correctly.

    Step 6: Automate Attendance-Based Follow-Up

    The most valuable part of integrating ConvertKit and Zoom is the ability to follow up differently based on attendance. Someone who attended the full session may be ready for a deeper offer, while someone who missed it may simply need the replay.

    After the webinar, configure your automation tool to retrieve attendance data from Zoom. Depending on the platform, the trigger may be based on a webinar ending, a participant attending, or a report becoming available. Use this data to apply tags in ConvertKit.

    For example:

    • If the person attended: Apply Webinar Attended and send a thank-you email with relevant next steps.
    • If the person registered but did not attend: Apply Webinar No Show and send a replay-focused message.
    • If the person clicked the offer link: Apply a high-intent tag and notify your sales team or start a targeted sequence.

    This segmentation makes your follow-up more relevant and respectful. It also improves conversion because subscribers receive messages that match their actual behavior.

    Step 7: Create Replay and Offer Emails

    If you recorded the webinar, upload or prepare the replay link before sending post-event emails. The replay may be hosted on Zoom, your website, a video platform, or a gated page. Make sure the link works and that access settings are correct.

    Your replay email should include:

    • A clear replay link: Place it near the top of the email.
    • A short summary: Remind readers what the webinar covered.
    • Time-sensitive context: If the replay expires, state the deadline honestly.
    • Next step: Invite them to book a call, buy a product, download a resource, or reply with questions.

    If your webinar includes a commercial offer, keep it transparent. Explain who the offer is for, what problem it solves, and what the subscriber should do if they are interested. Trust is more important than pressure, especially in professional webinar funnels.

    Step 8: Test the Entire Workflow

    Testing is not optional. Before sending traffic to your registration page, run the entire process using a test email address. Register through the ConvertKit form, verify that the contact is added to Zoom, confirm that tags are applied, and check whether emails arrive at the correct times.

    Test the following points:

    • Form submission: Does the ConvertKit form apply the correct tag?
    • Zoom registration: Is the person added to the correct webinar?
    • Join link: Is the link generated and delivered properly?
    • Email timing: Are confirmation and reminders scheduled correctly?
    • Attendance tracking: Are attendee and no-show tags applied after the event?
    • Unsubscribe behavior: Are subscriber preferences respected?

    If something fails, inspect the automation history in your connector, check field mappings, and verify that required fields are not missing. Most integration problems come from incorrect webinar selection, mismatched email fields, expired permissions, or duplicate automations.

    Image not found in postmeta

    Best Practices for Reliable Webinar Automation

    For a serious and sustainable setup, keep your automation simple and documented. Complex workflows may appear powerful, but they are harder to troubleshoot during a live campaign.

    • Use one source of truth: Decide whether ConvertKit or Zoom controls each communication.
    • Avoid duplicate emails: If Zoom sends reminders, do not send identical reminders from ConvertKit.
    • Document your tags: Maintain a short internal note explaining what each tag means.
    • Monitor early registrations: Review the first few signups manually to confirm the integration works.
    • Respect consent: Only send relevant webinar and follow-up emails to people who opted in.
    • Review analytics: Measure registration rate, attendance rate, replay views, clicks, and conversions.

    Common Mistakes to Avoid

    One common mistake is building the automation after promotion has already started. This creates unnecessary risk. You should finish and test the workflow before sharing the registration page publicly.

    Another mistake is failing to distinguish between registrants, attendees, and no-shows. Sending the same message to everyone may be easier, but it reduces relevance. A person who attended should receive a different follow-up than someone who missed the event.

    Finally, do not overlook compliance. Webinar automation involves personal data, including names, email addresses, and behavioral information. Use clear consent language, honor unsubscribe requests, and ensure your tools are configured according to applicable privacy requirements.

    Conclusion

    Setting up ConvertKit Zoom integration for webinar automation gives you a more reliable, professional, and scalable way to manage online events. By connecting registration, reminders, attendance tracking, and follow-up sequences, you can reduce manual work while delivering a better experience for subscribers.

    The most dependable approach is to plan the workflow first, create clean tags and forms in ConvertKit, configure the Zoom event carefully, connect the platforms through a trusted integration method, and test everything before launch. When implemented properly, this integration turns your webinar from a one-time presentation into a structured communication system that supports education, relationship-building, and measurable business outcomes.

  • DropFunnels Review: Is It the Right Funnel Builder for Your Business?

    DropFunnels Review: Is It the Right Funnel Builder for Your Business?

    Choosing a funnel builder can be difficult for businesses that need more than a simple landing page tool but do not want to manage a complicated stack of plugins, themes, hosting, and integrations. DropFunnels positions itself as an all-in-one platform that combines sales funnels, websites, blogs, courses, and search engine optimization features in one system. This review examines its core strengths, limitations, pricing considerations, and ideal use cases to help determine whether it is the right funnel builder for a growing business.

    TLDR: DropFunnels is a strong option for businesses that want funnels, websites, blogging, and basic course delivery in one platform. Its biggest advantage is that it runs on a WordPress-based structure while removing much of the technical maintenance normally associated with WordPress. However, it may not be the best fit for teams that need advanced enterprise automation, deep customization, or the broadest third-party app marketplace. For coaches, consultants, creators, and small businesses, it can be a practical and cost-effective funnel-building solution.

    What Is DropFunnels?

    DropFunnels is a funnel-building and website platform designed to help businesses create sales funnels, landing pages, membership areas, blogs, and full websites without needing separate hosting or complex plugin setups. Unlike many traditional funnel builders that focus mainly on sales pages and checkout flows, DropFunnels also emphasizes organic traffic through blogging and SEO-friendly site architecture.

    The platform is often described as a hybrid between a funnel builder and a website builder. It allows businesses to create opt-in funnels, webinar funnels, sales pages, product checkout pages, upsells, downsells, and thank-you pages. At the same time, it can host a complete website with navigation menus, blog posts, and content pages.

    This combination makes DropFunnels especially appealing to businesses that want to avoid running funnels on one platform, a blog on another, and courses somewhere else. Its main value is consolidation: fewer tools, fewer subscriptions, and a more unified customer journey.

    Image not found in postmeta

    Key Features of DropFunnels

    DropFunnels includes many features expected from a modern funnel builder, but its broader website and SEO capabilities help distinguish it from several competitors. The most important features include:

    • Drag-and-drop page builder: Users can build pages visually without coding. Sections, columns, images, videos, forms, buttons, and other elements can be added and customized.
    • Sales funnel creation: Businesses can create multi-step funnels for lead generation, product sales, webinars, applications, and free-plus-shipping offers.
    • Website builder: DropFunnels supports traditional website pages, menus, and branded navigation, making it more flexible than funnel-only tools.
    • Blogging tools: The platform allows businesses to publish blog content, which can support long-term search engine visibility.
    • SEO features: Pages and posts can be optimized with metadata, clean URLs, headings, and other SEO basics.
    • Course and membership areas: Businesses can deliver protected content, lessons, and training materials to customers or members.
    • Checkout and payment integrations: DropFunnels supports online sales through integrations with common payment processors.
    • Affiliate management: Some plans include affiliate program functionality, allowing businesses to recruit partners who promote their offers.

    User Experience and Ease of Use

    DropFunnels is designed for non-technical users, and its visual editor makes page creation relatively approachable. A marketer, consultant, coach, or small business owner can build a page by selecting a template, editing text, replacing images, and adjusting layouts. The platform removes many of the technical tasks normally associated with WordPress, such as installing hosting, updating plugins, managing themes, and configuring security tools.

    That said, the learning curve depends on the user’s previous experience. Someone familiar with funnel builders will likely adapt quickly. A complete beginner may still need time to understand funnel strategy, page settings, domains, integrations, and automation logic. DropFunnels simplifies the technical side, but it does not eliminate the need for clear marketing structure.

    The interface is generally practical, though it may feel less polished than some high-end design-first website builders. Its strength is functionality rather than artistic flexibility. For businesses that prioritize fast campaign launches, lead capture, and sales flow, this is often more important than pixel-perfect creative control.

    Templates and Design Flexibility

    DropFunnels provides templates for funnels, pages, and websites, which helps users launch faster than starting from a blank page. These templates can be customized with brand colors, copy, images, videos, and layout changes. For many small businesses, the available design flexibility is enough to produce professional-looking pages.

    However, designers who want total creative freedom may find some limitations. Like many drag-and-drop builders, DropFunnels works best when users stay within its structure. Complex animations, highly custom layouts, or advanced interactive page elements may require workarounds or may not be practical.

    For most marketing funnels, this is not a major problem. High-converting funnels usually depend more on clear messaging, compelling offers, strong calls to action, and fast load times than on elaborate design effects. DropFunnels is built with that practical marketing approach in mind.

    Image not found in postmeta

    SEO and Blogging Capabilities

    One of DropFunnels’ standout advantages is its focus on SEO and content marketing. Many popular funnel builders are excellent for paid traffic campaigns but are not ideal for building a long-term organic traffic strategy. DropFunnels attempts to solve that issue by combining funnels with blog and website functionality.

    A business can publish educational content, optimize it for search engines, and direct readers into lead magnets, consultations, product offers, or email sequences. This creates a smoother connection between content marketing and funnel marketing.

    For example, a coaching business could publish blog posts about productivity, leadership, or business growth, then send readers to a free training funnel or application page. Similarly, a course creator could write SEO-focused articles related to course topics and direct visitors into a webinar funnel or paid program.

    While DropFunnels includes useful SEO basics, it should not be viewed as a replacement for a complete SEO strategy. Businesses still need keyword research, quality content, internal linking, backlinks, and consistent publishing. The platform provides the structure, but results depend on execution.

    Course and Membership Features

    DropFunnels includes tools for creating simple membership areas and delivering online courses. This can be valuable for coaches, educators, consultants, and digital product sellers who want to keep their funnel, sales process, and content delivery under one roof.

    Users can organize lessons, restrict access, and provide customers with a login area. This is useful for mini-courses, paid trainings, client portals, and bonus content. It reduces the need to connect a separate learning management system for basic course delivery.

    However, businesses that need advanced learning features may eventually outgrow the built-in membership tools. Features such as deep student analytics, certificates, quizzes, assignments, community discussion, and complex course progression may be better handled by dedicated course platforms. DropFunnels is best suited for straightforward content delivery rather than a full academic learning environment.

    Integrations and Automation

    DropFunnels integrates with various external tools, particularly for email marketing, payments, tracking, and business automation. Common use cases include connecting forms to an email service provider, sending purchase data to a payment processor, or triggering automations through third-party workflow tools.

    For many small businesses, these integrations are sufficient. A business can capture leads, send them to an email sequence, process payments, and deliver protected content. That covers the core funnel requirements for most online offers.

    Still, integration depth is an important consideration. Larger businesses with complex CRM systems, advanced segmentation, custom reporting, or multi-step sales operations should carefully verify whether DropFunnels supports their required workflows. The platform works well for standard marketing funnels but may not satisfy every advanced automation scenario without additional tools.

    Performance and Reliability

    Page speed and reliability matter because slow-loading funnels can reduce conversions and increase advertising costs. DropFunnels aims to provide optimized hosting and performance without requiring users to manage servers or caching plugins. This is a major benefit compared with self-hosted WordPress setups, where performance depends heavily on hosting quality, theme choices, plugin conflicts, and technical configuration.

    In general, DropFunnels can perform well for typical funnel and website needs. Businesses should still optimize images, avoid excessive scripts, and keep pages focused. No funnel builder can fully compensate for oversized media files, messy tracking codes, or bloated page layouts.

    Image not found in postmeta

    Pricing and Value for Money

    DropFunnels is usually positioned as a premium but cost-conscious alternative to using several separate tools. A business might otherwise pay for funnel software, website hosting, a page builder, a blog platform, membership software, and affiliate management. By combining many of these features, DropFunnels can offer good value.

    The true value depends on how much of the platform a business actually uses. If a company only needs a single landing page, DropFunnels may be more than necessary. But if it needs a website, funnels, blog content, course hosting, and lead generation pages, the platform can reduce costs and simplify operations.

    Before subscribing, a business should compare the plan limits, number of funnels, domains, visitors, users, course features, and affiliate tools. It should also account for external expenses such as email marketing software, payment processing fees, custom domains, and advertising.

    Pros of DropFunnels

    • All-in-one structure: It combines websites, funnels, blogs, and memberships in one platform.
    • SEO-friendly approach: Blogging and organic search features make it stronger for content marketing than many funnel-only tools.
    • No hosting management: Users do not need to handle separate hosting, plugin updates, or WordPress maintenance.
    • Good for digital businesses: Coaches, consultants, course creators, and service providers can build complete customer journeys.
    • Affiliate capabilities: Built-in affiliate features can support partner-driven growth.
    • Practical page builder: The visual editor helps non-developers create pages and funnels quickly.

    Cons of DropFunnels

    • Learning curve for beginners: Users still need to understand funnel strategy, integrations, and conversion principles.
    • Design limitations: It may not satisfy designers who need advanced creative control.
    • Not ideal for enterprise complexity: Large teams with advanced CRM or automation needs may require more specialized tools.
    • Course tools are basic: Membership functionality is useful but not as advanced as dedicated learning platforms.
    • Value depends on usage: Businesses that only need simple landing pages may not use enough features to justify the cost.

    Who Should Consider DropFunnels?

    DropFunnels is best suited for businesses that want to build a complete online marketing system without duct-taping multiple platforms together. It is especially relevant for:

    • Coaches selling programs, consultations, or group training
    • Consultants generating leads through application funnels
    • Course creators selling digital products and trainings
    • Agencies building funnels and websites for clients
    • Service businesses that want a website plus lead generation funnels
    • Content marketers who want blog traffic to feed into sales funnels

    It may be less suitable for e-commerce stores with large product catalogs, enterprise organizations with heavy technical requirements, or businesses that already have a sophisticated website and marketing stack that works well.

    Is DropFunnels the Right Funnel Builder?

    DropFunnels can be the right funnel builder for a business that wants a balance between sales funnel functionality and long-term website growth. Its biggest advantage is not merely that it can create funnels; many platforms can do that. Its real strength is that it allows funnels, content, website pages, and memberships to exist in one connected environment.

    For a small or mid-sized business, this can reduce complexity and make marketing easier to manage. Instead of sending visitors across disconnected tools, the business can create a more cohesive experience from blog article to opt-in page, from sales page to checkout, and from purchase to member access.

    However, DropFunnels is not perfect for every situation. Businesses that require deep customization, advanced learning management, or enterprise-grade integrations should evaluate it carefully. The best decision depends on technical needs, marketing goals, budget, and team skill level.

    Overall, DropFunnels is a strong option for entrepreneurs and small businesses that want more than a basic funnel builder but less technical hassle than a self-hosted WordPress setup. It is particularly compelling for those that value SEO, content marketing, and simplified funnel management.

    FAQ

    What is DropFunnels used for?

    DropFunnels is used to build sales funnels, landing pages, websites, blogs, membership areas, and online course portals. It helps businesses capture leads, sell products or services, and deliver digital content.

    Is DropFunnels beginner-friendly?

    DropFunnels is beginner-friendly compared with managing a self-hosted website and multiple marketing tools. However, beginners may still need time to learn funnel strategy, page design, domain setup, and integrations.

    Can DropFunnels replace a website?

    Yes, DropFunnels can replace a traditional website for many businesses. It supports website pages, navigation, blog posts, and funnel pages, making it suitable for businesses that want both a site and sales funnels in one place.

    Is DropFunnels good for SEO?

    DropFunnels is more SEO-oriented than many funnel builders because it includes blogging tools and SEO-friendly page structures. Still, strong SEO results require quality content, keyword research, optimization, and consistent publishing.

    Does DropFunnels include course hosting?

    Yes, DropFunnels includes membership and course delivery features. It works well for simple courses, paid trainings, and protected content, although advanced education businesses may prefer a dedicated learning platform.

    Who should not use DropFunnels?

    DropFunnels may not be ideal for large e-commerce stores, enterprise teams with complex technical requirements, or businesses that only need a very simple one-page landing page solution.

    Is DropFunnels worth it?

    DropFunnels can be worth it for businesses that use its combined funnel, website, blog, and membership features. Its value is strongest when it replaces several separate tools and simplifies the overall marketing system.

  • Spoke Texting Platform Review: SMS Outreach and Engagement Features

    Spoke Texting Platform Review: SMS Outreach and Engagement Features

    Organizations that rely on text messaging for outreach need more than a basic bulk SMS tool. They need a platform that can support fast communication, controlled messaging, volunteer or staff workflows, contact segmentation, and meaningful follow-up. Spoke is best known as a peer-to-peer texting platform designed for campaigns, nonprofits, advocacy groups, unions, and civic organizations that want to reach people at scale while maintaining a human, conversational approach.

    TLDR: Spoke is a serious SMS outreach platform built for structured, high-volume engagement rather than casual marketing blasts. Its strengths are peer-to-peer texting, campaign management, volunteer workflows, contact targeting, and response handling. It is especially useful for political, nonprofit, and advocacy outreach, though teams should evaluate compliance, deliverability, integrations, and support needs before adopting it.

    What Is Spoke?

    Spoke is an SMS engagement platform focused on peer-to-peer texting, often called P2P texting. Unlike automated bulk SMS systems that send fully automated messages to large lists, peer-to-peer texting typically involves a real person manually initiating or managing conversations through a platform. This model is widely used in political campaigns, voter outreach, labor organizing, fundraising, event reminders, issue advocacy, and community mobilization.

    The core idea behind Spoke is simple: help organizations send messages at scale while preserving a more personal communication style. A campaign manager can create message scripts, upload or sync contact lists, assign texting work to staff or volunteers, and monitor responses from one central system. Texting agents can then send approved messages and reply to recipients using saved responses or personalized notes.

    Image not found in postmeta

    Who Is Spoke Best For?

    Spoke is most suitable for organizations that need organized, mission-driven communication with large audiences. It is not necessarily the first choice for a small business looking for simple promotional coupons or appointment reminders. Instead, it is better aligned with teams that need structured outreach operations, multiple users, message supervision, and response tracking.

    • Political campaigns using SMS for voter contact, persuasion, turnout, and event mobilization.
    • Nonprofits reaching donors, volunteers, supporters, or service communities.
    • Advocacy organizations coordinating petitions, calls to action, rallies, or legislative campaigns.
    • Unions and membership groups communicating with members about meetings, votes, negotiations, or benefits.
    • Community organizers building direct relationships with supporters at local or national scale.

    The platform’s value increases when an organization has a clear outreach strategy, trained texting agents, and defined follow-up goals. If a team only wants to send occasional one-way announcements, Spoke may offer more workflow depth than necessary.

    SMS Outreach Features

    Spoke’s primary strength is campaign-based SMS outreach. Administrators can create messaging campaigns, define the audience, prepare scripts, and assign conversations to texters. This gives managers direct control over messaging consistency while still allowing conversations to feel personal.

    Contact list management is a major part of the workflow. Teams can upload lists, organize recipients by segment, and target specific groups based on campaign needs. For example, a voter outreach team might separate contacts by district, voting history, issue interest, or event attendance. A nonprofit might segment supporters by donation status, volunteer role, or previous engagement.

    Message scripting helps maintain quality and compliance. Administrators can create opening messages and response templates so texters do not have to write every answer from scratch. This is especially important for organizations with many volunteers, because it reduces the risk of inconsistent or off-message communication.

    Assignment tools allow campaign managers to distribute texting work among users. A large list can be divided into manageable batches, making it easier to coordinate outreach without overwhelming individual texters. Supervisors can also track progress and identify whether a campaign is moving quickly enough.

    Engagement and Conversation Management

    SMS outreach is only useful if teams can manage replies effectively. Spoke is designed around two-way conversations, meaning recipients can respond and texting agents can continue the interaction. This is a key difference from basic broadcast SMS platforms, where replies may be limited, disconnected, or difficult to manage.

    Saved replies and suggested responses help texters answer common questions efficiently. For example, a campaign may prepare responses for “Where is my polling place?”, “How do I volunteer?”, or “Can you remove me from the list?” This makes responses faster and more accurate while keeping communication consistent.

    Human judgment still matters. While templates are useful, the best outreach teams train texters to personalize replies when needed. Spoke can support this workflow, but the quality of engagement depends on the organization’s message strategy, training, and supervision.

    Image not found in postmeta

    Volunteer and Team Workflow

    One of Spoke’s most important advantages is its usefulness for distributed teams. Many advocacy and political organizations depend on volunteers who may be working remotely, during evenings, or in short bursts of time. Spoke gives these teams a structured environment where volunteers can log in, send assigned messages, and handle replies without needing access to the organization’s full contact database.

    This approach supports both scale and control. Managers can prepare the campaign, approve scripts, and monitor activity, while volunteers focus on execution. For serious outreach operations, this separation of responsibilities is valuable. It helps protect data, maintain message discipline, and reduce operational confusion.

    Role-based access and administrative controls are important considerations. Organizations should evaluate how Spoke handles permissions, user onboarding, reporting access, and account security. For any platform used by multiple staff members or volunteers, internal governance is just as important as the software itself.

    Reporting and Performance Tracking

    Spoke provides managers with visibility into outreach progress and engagement outcomes. Typical performance indicators may include sent messages, response rates, completed assignments, opt-outs, and conversation status. These metrics help teams understand whether their campaign is reaching people and whether the message is producing useful engagement.

    Reporting is especially important for campaigns with deadlines. A voter turnout operation, for instance, needs to know whether its contact universe has been fully reached before election day. A nonprofit fundraising campaign may need to identify which supporters responded positively and should receive follow-up from a staff member.

    However, organizations should remember that SMS metrics require interpretation. A high response rate is not automatically positive if many replies are negative or confused. A low response rate may still be acceptable for reminder campaigns. The most valuable reporting comes when teams connect Spoke activity to real outcomes, such as event attendance, volunteer signups, donations, pledge commitments, or completed calls to legislators.

    Compliance and Deliverability Considerations

    SMS outreach in the United States and many other markets is subject to telecommunications rules, carrier policies, consent requirements, and opt-out obligations. Any organization using Spoke should pay close attention to compliance. This includes obtaining appropriate consent where required, honoring opt-out requests, using accurate sender information, and avoiding misleading or abusive messaging practices.

    Peer-to-peer texting does not remove compliance responsibilities. Even when messages are sent by individual texters through a platform, teams still need to understand applicable laws and carrier rules. Political, nonprofit, and commercial messaging may be treated differently depending on jurisdiction and message type, so legal review is often appropriate for larger campaigns.

    Deliverability is another major issue. SMS deliverability can be affected by message content, sending volume, number registration, carrier filtering, complaint rates, and opt-out behavior. Serious users should ask Spoke or any SMS vendor about carrier registration, 10DLC requirements, throughput, number management, and best practices for avoiding filtering.

    Ease of Use

    Spoke is generally designed for operational teams rather than casual users. Campaign managers should expect a setup process that includes list preparation, script creation, user assignment, and testing. Once campaigns are configured, the texting interface can be straightforward for volunteers and staff, especially if scripts and reply templates are well prepared.

    The learning curve depends heavily on organizational complexity. A small advocacy group running one campaign may get comfortable quickly. A national organization with multiple audiences, integrations, compliance requirements, and reporting needs will need more formal training and internal procedures.

    Image not found in postmeta

    Integrations and Data Management

    For many organizations, Spoke’s usefulness depends on how well it fits into the broader data ecosystem. Campaigns often use voter files, CRM systems, donor databases, membership platforms, and analytics tools. The ability to import, export, sync, or connect information can determine whether Spoke becomes a central outreach tool or a separate operational silo.

    Before adopting Spoke, teams should ask practical questions:

    • Can contact lists be imported cleanly and updated regularly?
    • Can response data be exported for follow-up?
    • Does the platform support the organization’s CRM or voter database?
    • How are opt-outs stored and enforced across future campaigns?
    • What data security practices protect sensitive contact information?

    Data hygiene is critical. Duplicate contacts, outdated phone numbers, unclear consent records, and poor segmentation can reduce effectiveness and increase risk. Spoke can support outreach execution, but the quality of the underlying data remains the organization’s responsibility.

    Pricing and Value

    Spoke pricing may vary based on usage, volume, features, support level, or organizational needs. Because SMS costs can change and contracts may differ, teams should confirm current pricing directly with the provider before making a decision. It is also important to understand whether costs are based on messages sent, user seats, contact volume, platform access, or a combination of factors.

    When evaluating value, organizations should look beyond the headline price. A lower-cost platform may become expensive if it lacks proper compliance support, reporting, or integrations. Conversely, a more capable system can justify its cost if it improves volunteer productivity, increases response quality, and reduces administrative work.

    Strengths and Limitations

    Key strengths of Spoke include:

    • Strong focus on peer-to-peer SMS outreach.
    • Useful workflows for volunteers and distributed teams.
    • Campaign scripting and saved replies for message consistency.
    • Two-way engagement tools for real conversations.
    • Good fit for advocacy, political, nonprofit, and membership campaigns.

    Potential limitations include:

    • May be more complex than necessary for simple one-way SMS alerts.
    • Requires careful data preparation and campaign management.
    • Compliance responsibilities remain significant.
    • Pricing and feature availability should be verified for each organization.
    • Effectiveness depends on training, scripts, segmentation, and follow-up discipline.

    Final Verdict

    Spoke is a credible SMS outreach platform for organizations that need structured, human-centered engagement at scale. Its strongest use cases are campaigns where conversations matter: voter outreach, supporter mobilization, volunteer recruitment, member communication, and advocacy follow-up. The platform is not simply about sending texts; it is about organizing a texting operation with control, accountability, and measurable engagement.

    For teams with serious outreach goals, Spoke deserves consideration. It can help transform SMS from a basic announcement channel into a coordinated engagement system. However, buyers should evaluate compliance support, delivery infrastructure, integrations, reporting needs, and total cost before committing. Used carefully, with clean data and trained texters, Spoke can be a practical and effective tool for modern SMS outreach.

  • Tournament Banner Design: 15 Examples for Sports and Gaming Events

    Tournament Banner Design: 15 Examples for Sports and Gaming Events

    Effective tournament banner design is not just decoration. It is a practical communication tool that sets expectations, builds credibility, guides attention, and helps spectators or players understand the identity of an event before it begins. Whether the event is a local basketball championship, a regional esports qualifier, or a sponsored charity golf tournament, the banner must clearly present the event name, date, venue, sponsors, and competitive atmosphere.

    TLDR: A strong tournament banner should be clear, visually disciplined, and appropriate for the sport or game being promoted. The best designs use hierarchy, contrast, team or event colors, and focused imagery to communicate quickly. Sports banners often benefit from motion, action photography, and bold typography, while gaming banners usually rely on atmosphere, digital effects, and character-driven visuals. The 15 examples below show how different tournament types can be presented with authority and impact.

    Why Tournament Banner Design Matters

    A tournament banner often becomes the first visual contact between the event and its audience. It may appear on social media, printed signage, venue entrances, websites, ticketing pages, live streams, or sponsor presentations. Because of this, the design must work across multiple formats and still remain readable.

    Good design does more than look impressive. It helps answer essential questions: What is the event? Who is competing? When and where is it happening? Why should people care? If a banner fails to answer these quickly, even a visually attractive design can underperform.

    For serious tournaments, the design should also reflect organization and professionalism. A poorly aligned layout, weak typography, or cluttered sponsor section can make an event appear less reliable. In contrast, a disciplined visual identity strengthens trust among athletes, teams, viewers, sponsors, and media partners.

    Image not found in postmeta

    Core Principles of a Strong Tournament Banner

    • Clear hierarchy: The event name should be the dominant element, followed by the date, venue, and registration or viewing details.
    • Readable typography: Use bold, legible fonts that remain clear at different sizes, especially for outdoor signage and mobile screens.
    • Appropriate imagery: A tennis tournament banner should not feel like a boxing poster, and a strategy gaming event should not look like an arcade racing ad.
    • Consistent color palette: Use team colors, league colors, or a controlled palette that reinforces the event identity.
    • Balanced sponsor placement: Sponsor logos should be visible but not overpower the event message.
    • Format adaptability: A banner should be easy to adapt for print, digital ads, social media headers, and livestream overlays.

    15 Tournament Banner Design Examples

    1. Football Championship Banner

    A football championship banner should communicate strength, scale, and intensity. Deep greens, black, white, metallic gold, or team colors are often suitable choices. A strong design might feature a stadium background, a football in motion, and silhouettes of players in action.

    The title should be large and stable, often in a condensed bold typeface. Supporting details such as final match date, venue, and ticket information can sit beneath the headline. For championship banners, the use of a trophy image can add legitimacy, but it should not make the layout crowded.

    2. Basketball Tournament Banner

    Basketball banners benefit from vertical energy. A player jumping toward the hoop, a textured court background, or orange and black contrast can immediately signal the sport. Because basketball is fast and dynamic, angled lines and motion blur can be used carefully to suggest speed.

    For school, college, or community tournaments, include bracket information or division labels only if space allows. The strongest banner designs keep the central message simple: tournament name, date, venue, and call to action.

    3. Soccer Cup Banner

    A soccer cup banner should feel global, competitive, and clean. Green field textures, stadium lights, club crests, and national or regional color accents can work well. The layout should avoid excessive visual noise because soccer events often involve multiple teams, sponsors, and schedule details.

    A useful approach is to place the event title in the center, flanked by team or division identifiers. If the tournament includes youth, amateur, and professional divisions, use separate visual tiers rather than placing every detail into one block of text.

    4. Tennis Open Banner

    Tennis events usually need a more refined visual style than contact sports. White space, clean lines, and premium typography are effective, especially for club tournaments or sponsored open events. Colors such as navy, green, white, and yellow can suggest tradition and focus.

    A tennis banner may use an action shot of a serve, a racket and ball close-up, or a court surface texture. The final design should feel polished and controlled, reflecting the discipline of the sport.

    5. Baseball Tournament Banner

    Baseball banner design often works well with classic sports visual language: bold serif or varsity-style typography, stitched ball textures, grass backgrounds, and scoreboard motifs. For youth leagues and regional tournaments, a banner can feel energetic while still remaining organized.

    Important information should include the tournament name, age group, location, dates, and registration deadline. If the event has a long history, include the year or edition prominently, such as 15th Annual Summer Classic.

    Image not found in postmeta

    6. Volleyball Tournament Banner

    Volleyball banners should emphasize teamwork, height, and movement. Beach volleyball banners may use sand, sunlight, and coastal colors, while indoor volleyball banners can rely on strong contrast, court lighting, and team silhouettes.

    Because volleyball events often include multiple courts or divisions, clarity is especially important. Use icons or small labels for categories such as men’s, women’s, mixed, or junior divisions instead of long explanatory text.

    7. Martial Arts Tournament Banner

    A martial arts tournament banner should convey discipline, respect, and controlled power. Depending on the specific style, the design may use black, red, white, gold, or muted earth tones. Imagery should be respectful and accurate, avoiding exaggerated clichés that reduce credibility.

    For karate, taekwondo, judo, or mixed martial arts events, include federation or organizing body logos clearly. Weight classes, belt divisions, and registration deadlines may be important, but they should be placed in a structured information area rather than scattered across the design.

    8. Golf Tournament Banner

    Golf tournament banners usually require a professional and understated approach. This is particularly true for corporate outings, charity events, and sponsor-driven competitions. Greens, blues, whites, and gold accents can create a calm, reputable appearance.

    Instead of aggressive motion, golf banners often use scenic course photography, a golfer mid-swing, or a close-up of a ball on the green. Sponsor recognition is frequently important, so allocate a clean lower section for logos and partner names.

    9. Track and Field Event Banner

    Track and field banners should express speed, precision, and competition. A runner at the starting line, a sprinter in motion, hurdles, or a track lane background can provide immediate context. Red, blue, black, and white color schemes are common because they provide strong contrast.

    Since these events may include many categories, limit the main banner to essential details. Schedules, heat sheets, and technical information should be distributed separately or linked through a QR code.

    10. Esports Championship Banner

    An esports championship banner should feel modern, sharp, and high-stakes. Dark backgrounds, neon highlights, digital textures, and strong glow effects are commonly used, but they must be controlled. Too many effects can make the design look amateur or difficult to read.

    The event title should be the most prominent element, often paired with a trophy, controller, keyboard, or abstract digital emblem. Include the game title, prize pool, date, platform, and livestream information. If the event is official or sponsored, place logos in a predictable and balanced arrangement.

    Image not found in postmeta

    11. First Person Shooter Tournament Banner

    For a first person shooter tournament, visual intensity is expected. Tactical colors such as black, gray, red, and military green can work well, depending on the game’s tone. Backgrounds may include smoke, sparks, maps, or weapon silhouettes, but the design should avoid becoming chaotic.

    Important details include team size, platform, match format, prize pool, and registration deadline. Use bold typography and strong contrast so the banner remains readable during fast scrolling on social media feeds.

    12. Fighting Game Tournament Banner

    Fighting game banners should emphasize confrontation and character. Split-screen compositions are effective because they suggest direct competition. Bright energy effects, impact lines, and arcade-inspired typography can be appropriate when used with restraint.

    The main challenge is avoiding clutter. Fighting games often have strong character art, sponsor logos, brackets, and community details. Keep the headline clean and place secondary details in structured zones so the viewer can process the information quickly.

    13. MOBA Tournament Banner

    Multiplayer online battle arena tournaments require a strategic and atmospheric visual style. Dark fantasy, futuristic, or map-based backgrounds can help support the theme. Since these games often have established communities, the banner should look polished enough to meet audience expectations.

    Include the tournament format, team size, prize pool, and broadcast channel. If the event has qualifiers and finals, use a simple timeline rather than a dense paragraph. A well-made MOBA banner should feel competitive, organized, and serious.

    14. Racing Game Tournament Banner

    Racing tournament banners should communicate speed and precision. Motion streaks, track curves, tire marks, city lights, or vehicle silhouettes can be used to create impact. Color schemes often include black, red, silver, yellow, or electric blue.

    The typography should be slanted or streamlined only if it remains legible. Include the game name, platform, qualifying date, final race date, and any hardware requirements, such as wheel support or controller rules.

    15. Chess or Strategy Gaming Banner

    Not every gaming banner needs neon lighting or explosive effects. Chess and strategy gaming tournaments often benefit from a more intellectual and restrained design. Dark wood textures, chess pieces, grids, maps, or minimalist geometric patterns can create authority.

    Use refined typography and a clear structure. The banner should highlight the tournament name, rating category, time control, platform or venue, and registration details. A serious strategy event is best represented by clarity, not visual excess.

    Design Considerations for Print and Digital Use

    Before finalizing a tournament banner, confirm where it will appear. A printed entrance banner, a social media post, and a livestream header all require different proportions. A horizontal vinyl banner may need large text visible from a distance, while a mobile advertisement must communicate in seconds on a small screen.

    For print, use high-resolution images, sufficient bleed, and strong contrast. For digital use, test the design on mobile and desktop screens. Avoid placing essential information too close to the edges, where it may be cropped by platform previews.

    Common Mistakes to Avoid

    • Overloading the design: Too many logos, dates, effects, and images can weaken the message.
    • Using low-quality imagery: Blurry photos or stretched graphics reduce trust immediately.
    • Ignoring hierarchy: If the date is larger than the event name, the viewer may misunderstand the priority.
    • Poor contrast: Text must stand out clearly against the background.
    • Inconsistent branding: Colors, fonts, and logo placement should support one unified identity.
    • Forgetting accessibility: Small text, low contrast, and overly decorative fonts can exclude viewers.

    Practical Layout Structure

    A reliable tournament banner layout can be built around five sections. First, place the event name in the strongest visual position. Second, add a supporting line that explains the type of event, such as Regional Qualifier or Open Championship. Third, include date and venue details. Fourth, add registration, ticketing, or broadcast information. Fifth, reserve a clean area for sponsors and organizers.

    This structure works because it matches the way viewers scan information. They notice the headline first, then confirm the details, then decide whether to participate, attend, or share the event.

    Final Thoughts

    Tournament banner design requires a balance between visual excitement and reliable communication. Sports events often demand physical energy, movement, and team identity, while gaming events may require digital atmosphere, competitive tension, and platform-specific details. In both cases, the banner must serve the audience first.

    The best tournament banners are not merely attractive. They are organized, readable, credible, and aligned with the character of the competition. By studying these 15 examples and applying disciplined design principles, organizers can create banners that support participation, strengthen event identity, and present the tournament with the seriousness it deserves.

  • Best Store Leads Alternatives for Ecommerce Research and Prospecting

    Best Store Leads Alternatives for Ecommerce Research and Prospecting

    Ecommerce prospecting has become a data game. Whether you sell apps, development services, logistics, marketing, payments, or fulfillment solutions, the ability to identify the right online stores at the right moment can make your outreach dramatically more effective. Store Leads is a popular tool for discovering ecommerce stores and filtering them by platform, technology, location, traffic, and more, but it is not the only option. Depending on your budget, target market, and workflow, several alternatives may offer broader company intelligence, deeper technology detection, better contact data, or stronger competitive research.

    TLDR: The best Store Leads alternative depends on what you need most: store discovery, technology tracking, contact enrichment, traffic intelligence, or sales prospecting. BuiltWith and Wappalyzer are strong for technology data, while Similarweb is better for traffic and market insights. Apollo, ZoomInfo, and LinkedIn Sales Navigator are ideal when contact discovery and outbound prospecting are priorities. For ecommerce-specific research, tools like PipeCandy, Commerce Inspector, and Koala Inspector can be especially useful.

    What to Look for in a Store Leads Alternative

    Before comparing tools, it helps to define what “better” means for your team. Some platforms are built for data discovery, while others focus on sales engagement, technology intelligence, or competitive analysis. A founder selling Shopify apps may need a very different tool than an agency looking for fast-growing DTC brands in the United States.

    The most important evaluation criteria include:

    • Ecommerce platform coverage: Can the tool identify Shopify, WooCommerce, BigCommerce, Magento, custom platforms, and headless commerce setups?
    • Technology detection: Does it show apps, analytics tools, ad pixels, payment providers, loyalty software, or helpdesk platforms?
    • Contact data: Can you find decision-makers, emails, LinkedIn profiles, or company phone numbers?
    • Traffic and performance insights: Does it estimate visits, growth trends, traffic sources, and ranking data?
    • Filters and segmentation: Can you narrow results by country, industry, revenue estimate, employee count, platform, or installed technologies?
    • Export and integrations: Does it connect with your CRM, email tool, or sales automation system?
    • Data freshness: Is the database updated frequently enough to identify new stores and recent technology changes?

    With those criteria in mind, here are some of the strongest alternatives for ecommerce research and prospecting.

    Image not found in postmeta

    1. BuiltWith

    BuiltWith is one of the most established technology lookup and lead generation tools. It tracks websites by the technologies they use, including ecommerce platforms, analytics scripts, advertising pixels, payment systems, hosting providers, marketing tools, and more.

    For ecommerce prospecting, BuiltWith is valuable because it allows you to create lists based on specific technologies. For example, you could find Shopify stores using Klaviyo, WooCommerce sites using Stripe, or Magento merchants running Google Tag Manager and Facebook Pixel. That level of targeting is helpful for SaaS companies, agencies, and consultants looking for highly relevant prospects.

    Best for: Technology-based targeting, competitive intelligence, and identifying stores using specific tools.

    Potential drawback: BuiltWith is powerful, but its interface can feel dense, and pricing may be high for smaller teams that only need simple store lists.

    2. Wappalyzer

    Wappalyzer is another strong technology profiling tool. It detects software used by websites, including ecommerce platforms, CMS systems, analytics tools, advertising networks, JavaScript frameworks, and customer support tools. Compared with some enterprise platforms, Wappalyzer is often easier to use and can be attractive for lean sales teams.

    One of its biggest advantages is flexibility. You can use the browser extension for quick research, run lookups on individual websites, or use bulk data and APIs for larger workflows. If your prospecting strategy depends on identifying stores that use or do not use a particular tool, Wappalyzer is worth considering.

    Best for: Simple technology detection, API workflows, and affordable prospecting research.

    Potential drawback: Contact data and ecommerce-specific filters may not be as deep as dedicated sales intelligence platforms.

    3. Similarweb

    If your priority is understanding traffic, market position, and digital performance, Similarweb is one of the best options. Rather than simply telling you what technology a store uses, it helps estimate how much traffic a site receives, where visitors come from, which channels drive growth, and how competitors compare.

    This is especially useful when you want to prioritize accounts. A list of 20,000 ecommerce stores is not very helpful unless you can identify which ones are growing, spending on paid channels, or attracting meaningful traffic. Similarweb can help you sort prospects by opportunity size and market relevance.

    Best for: Traffic analysis, market research, competitive benchmarking, and account prioritization.

    Potential drawback: It is not primarily a contact database, so you may need another tool for email discovery and outbound sales execution.

    4. Apollo

    Apollo is not ecommerce-specific, but it is one of the most useful prospecting platforms for teams that need contact data and outreach capabilities. It offers company search, people search, verified emails, job titles, sequences, CRM integrations, and sales engagement features.

    For ecommerce research, Apollo works best when paired with another store discovery or technology intelligence tool. For example, you might use BuiltWith or Wappalyzer to identify Shopify Plus merchants, then use Apollo to find founders, heads of ecommerce, marketing directors, or operations leaders at those companies.

    Best for: Finding decision-makers and running outbound sequences.

    Potential drawback: Ecommerce platform detection is not its core strength, so it may not replace Store Leads by itself.

    Image not found in postmeta

    5. ZoomInfo

    ZoomInfo is a heavyweight sales intelligence platform used by larger sales organizations. It provides company profiles, contact data, intent signals, org charts, technographic data, and integrations with major CRMs. If your ecommerce prospecting is part of a larger B2B sales operation, ZoomInfo can be extremely powerful.

    The biggest benefit is depth. You can find company size, revenue estimates, department structures, hiring signals, and buyer intent data. For agencies or vendors selling high-ticket services to established ecommerce companies, this can help sales teams identify accounts that are both qualified and ready to buy.

    Best for: Enterprise sales teams, account-based marketing, and high-value prospecting.

    Potential drawback: Pricing can be significant, and it may be more than a small ecommerce SaaS team needs.

    6. PipeCandy

    PipeCandy is a data platform focused heavily on ecommerce and direct-to-consumer brands. It provides information about merchants, categories, revenue estimates, fulfillment signals, technology usage, and market segments. For companies selling to ecommerce brands, PipeCandy can be a serious alternative because its data model is built around commerce rather than general B2B prospecting.

    It is especially useful for understanding the shape of the ecommerce market: which brands are growing, what categories they operate in, how mature they appear to be, and whether they fit your ideal customer profile. Logistics providers, fintech companies, agencies, and ecommerce infrastructure vendors may find it particularly relevant.

    Best for: Ecommerce market mapping, DTC brand research, and account segmentation.

    Potential drawback: It may be better suited to strategic research and enterprise workflows than quick, low-cost lead scraping.

    7. Commerce Inspector

    Commerce Inspector is popular among ecommerce operators, marketers, and competitive researchers. It is particularly known for tracking Shopify stores, product launches, best-selling products, apps, ads, and store activity. While it is often used for competitor research, it can also support prospecting.

    For example, if you sell creative services, product photography, conversion optimization, or Shopify development, you can use Commerce Inspector to identify active stores that are launching products, testing apps, or scaling their catalogs. These behavioral signals can make outreach more timely and specific.

    Best for: Shopify research, competitor monitoring, product intelligence, and identifying active merchants.

    Potential drawback: It is not as broad as a general B2B contact or sales intelligence database.

    8. Koala Inspector

    Koala Inspector is another tool designed for Shopify store research. It can help reveal store themes, installed apps, product information, pricing, traffic estimates, and other details useful for ecommerce analysis. It is often used by dropshippers and ecommerce entrepreneurs, but sales teams can also use it to understand prospects before outreach.

    The main advantage is speed. If you are researching a particular store, Koala Inspector can quickly give you context about how that business is set up. This can help personalize emails, qualify prospects, or identify gaps in a store’s tech stack.

    Best for: Quick Shopify store checks, app research, and prospect personalization.

    Potential drawback: It is more useful for individual research than large-scale lead generation.

    9. LinkedIn Sales Navigator

    LinkedIn Sales Navigator is not a store discovery tool, but it is excellent for identifying and engaging the people behind ecommerce brands. Once you have a target account list, Sales Navigator helps you find founders, ecommerce managers, growth marketers, brand directors, and operations executives.

    Its real strength is relationship-based prospecting. You can filter by role, seniority, geography, industry, company headcount, and recent activity. You can also monitor job changes and company updates, which often create timely reasons to reach out.

    Best for: Decision-maker research, social selling, and account-based outreach.

    Potential drawback: You will likely need a separate tool for ecommerce store discovery and email enrichment.

    Image not found in postmeta

    10. Crunchbase

    Crunchbase is useful when you want to find funded ecommerce companies, fast-growing startups, marketplace brands, or commerce technology firms. It provides funding data, company profiles, investor information, acquisition news, and growth signals.

    For prospecting, Crunchbase is most helpful when your ideal customers are venture-backed or growth-oriented. A newly funded ecommerce brand may be more likely to invest in marketing, operations, software, hiring, or infrastructure. That makes funding events valuable triggers for personalized outreach.

    Best for: Finding funded ecommerce companies and tracking growth signals.

    Potential drawback: It will not cover the long tail of smaller independent online stores as well as ecommerce-specific databases.

    How to Choose the Right Alternative

    The best choice depends on your prospecting motion. If you need to identify stores by platform and installed tools, start with BuiltWith or Wappalyzer. If you care about traffic and digital performance, choose Similarweb. If your biggest challenge is finding the right person to contact, look at Apollo, ZoomInfo, or LinkedIn Sales Navigator.

    For commerce-focused data, PipeCandy is one of the strongest options, especially for teams selling into DTC and retail brands. If you primarily work with Shopify merchants and want fast competitive insights, Commerce Inspector or Koala Inspector may be more practical.

    In many cases, the best stack is not a single replacement. A strong ecommerce prospecting workflow might look like this:

    1. Discover stores using BuiltWith, Wappalyzer, PipeCandy, or an ecommerce research tool.
    2. Prioritize accounts with Similarweb traffic estimates, funding data, or technology signals.
    3. Find decision-makers using Apollo, ZoomInfo, or LinkedIn Sales Navigator.
    4. Personalize outreach with insights from Commerce Inspector, Koala Inspector, or the store’s own website.
    5. Track results in your CRM and refine your filters based on conversion rates.

    Final Thoughts

    Store Leads is a useful platform, but ecommerce research is too broad for one tool to solve every problem perfectly. Some teams need fresh lists of Shopify stores. Others need technographic data, buying signals, traffic estimates, or direct access to decision-makers. The smartest approach is to match the tool to the job rather than searching for a universal replacement.

    If you are building a lean prospecting process, begin with one discovery tool and one contact tool. As your sales motion matures, add traffic intelligence, competitive research, and intent signals. With the right combination, you can move beyond generic lead lists and build a sharper, more relevant pipeline of ecommerce brands that are actually worth contacting.

  • Penguin Logo Design: Symbolism, Branding, and Creative Concepts

    Penguin Logo Design: Symbolism, Branding, and Creative Concepts

    Penguin logo design has become a compelling niche in visual identity because the penguin is instantly recognizable, emotionally engaging, and rich with symbolic meaning. Across industries, a penguin can communicate friendliness, resilience, intelligence, elegance, teamwork, and adaptability. Whether used by a children’s brand, a technology company, an environmental organization, or a premium lifestyle label, the penguin offers designers a versatile character that can move between playful charm and sophisticated minimalism.

    TLDR: A penguin logo can symbolize trust, adaptability, community, endurance, and approachable intelligence. Its distinctive silhouette makes it highly memorable, while its black-and-white coloring supports both minimalist and premium branding. Successful penguin logos balance personality with simplicity, ensuring the mark remains recognizable across digital, print, and product applications.

    The Symbolism Behind Penguin Logo Design

    The penguin is more than a cute animal; it carries a layered symbolic identity. In nature, penguins survive in some of the planet’s harshest environments, making them powerful symbols of resilience, patience, and strength under pressure. A brand that wishes to suggest reliability or calm endurance may find the penguin especially effective.

    Penguins are also known for their strong social bonds. They live in colonies, cooperate to stay warm, and often appear as loyal, family-oriented creatures. This makes penguin imagery suitable for brands centered on community, teamwork, education, family services, and customer care. A penguin logo can suggest that a business is supportive, organized, and people-focused.

    The bird’s upright posture gives it a uniquely human quality. Unlike many animal mascots, the penguin naturally appears dressed, composed, and slightly formal because of its tuxedo-like markings. This visual association allows penguin logos to communicate both warmth and professionalism. A brand can use this duality to appear friendly without losing credibility.

    Image not found in postmeta

    Why Penguins Work Well in Branding

    One reason penguins work well in branding is their immediate recognizability. Their rounded body, flipper-like wings, white belly, dark back, and small beak form a simple visual structure that can be reduced into an icon without losing meaning. This is a major advantage in logo design, where clarity at small sizes is essential.

    Penguin logos also have broad emotional appeal. They can feel gentle, clever, humorous, premium, or adventurous depending on the artistic direction. A rounded cartoon penguin may suit a children’s learning platform, while a sleek geometric penguin may work for a technology startup. A refined penguin monogram may support a boutique clothing label, and an abstract penguin mark may fit an environmental nonprofit.

    The contrast between black and white gives the penguin a strong built-in visual identity. Designers can use this contrast to create logos that are bold, legible, and adaptable. In many cases, a penguin logo can work effectively in one color, two colors, or full color. This flexibility makes it practical for signage, app icons, packaging, embroidery, social media profiles, and merchandise.

    Common Brand Personalities for Penguin Logos

    A penguin logo can support several brand personalities. The final impression depends on shape, typography, color, expression, and composition.

    • Friendly and playful: Rounded shapes, smiling expressions, large eyes, and soft colors create a charming mascot style.
    • Smart and modern: Clean geometry, simplified features, and sans-serif typography make the logo feel innovative and efficient.
    • Premium and elegant: Slim proportions, black-and-white contrast, custom type, and refined spacing create a sophisticated identity.
    • Eco-conscious and natural: Organic lines, cool blues, icy whites, and nature-inspired palettes emphasize conservation and environmental awareness.
    • Reliable and professional: Balanced symmetry, upright posture, and restrained expression suggest stability and trust.

    Penguin Logo Styles and Creative Concepts

    There are many creative directions for penguin logo design. Each approach can serve a different brand purpose, and the best solution is often the one that matches the brand’s market, audience, and tone of voice.

    1. Minimalist Penguin Logo

    A minimalist penguin logo uses a small number of shapes to capture the bird’s essence. Designers may rely on a simple oval body, a white belly shape, two flippers, and a small triangular beak. This style is effective for modern brands because it feels clean, scalable, and timeless. It also performs well in digital environments such as mobile apps, favicons, and social icons.

    2. Mascot Penguin Logo

    A mascot-style penguin gives the brand a character. This approach is common for businesses that want to feel approachable, entertaining, or youth-oriented. A mascot penguin may wave, hold an object, wear accessories, or display a distinct facial expression. The character can become part of a larger brand world across advertising, packaging, animation, and social media.

    3. Geometric Penguin Logo

    A geometric penguin uses circles, triangles, polygons, and clean angles to create a structured mark. This style suits technology, finance, consulting, and design-related brands because it suggests logic, precision, and innovation. The penguin’s natural shape adapts well to geometry, especially when the designer emphasizes the contrast between its body, belly, and beak.

    Image not found in postmeta

    4. Luxury Penguin Logo

    A luxury penguin logo may avoid cartoon details and instead focus on elegance. The bird can be drawn with long lines, graceful posture, and subtle negative space. Premium typography, especially serif or custom lettering, can elevate the mark. This direction works well for fashion, hospitality, premium food products, and lifestyle brands that want a memorable but refined animal symbol.

    5. Environmental Penguin Logo

    Penguins are closely connected to ice, oceans, and climate awareness. Environmental organizations may use penguin imagery to represent endangered ecosystems, marine protection, or climate action. These logos often include shades of blue, white, teal, or green, sometimes paired with waves, ice forms, leaves, or circular shapes that suggest global unity.

    Color Choices in Penguin Logo Design

    The traditional penguin palette of black, white, and yellow or orange is already strong. Black conveys authority, elegance, and simplicity. White suggests purity, clarity, and openness. Orange or yellow on the beak and feet can add warmth and energy. This natural palette is easy to recognize and can be adapted for many industries.

    However, penguin logos do not need to be limited to realistic colors. A children’s brand may use pastel blue, mint, or lavender to soften the identity. A tech company may use electric blue or neon accents to suggest innovation. A premium brand may use black, ivory, gold, or deep navy. A nonprofit may use icy blue and green to emphasize environmental themes.

    The most important consideration is brand consistency. If the penguin is colored in an unexpected way, the shape must remain recognizable. Strong silhouette design allows the logo to remain identifiable even when color changes for seasonal campaigns, merchandise, or special editions.

    Typography Pairings for Penguin Logos

    Typography plays a major role in defining the personality of a penguin logo. A rounded sans-serif typeface can reinforce friendliness and accessibility. A geometric sans-serif can make the identity feel contemporary and efficient. A serif typeface may create a more editorial, established, or luxury impression. Hand-drawn lettering can give the identity a handmade or childlike charm.

    The type should not compete with the penguin symbol. If the illustration is detailed, the typography often needs to be simpler. If the penguin icon is extremely minimal, the lettering may carry more personality. A well-balanced logo system allows the penguin symbol and wordmark to function together or separately without weakening the brand.

    Using Negative Space and Silhouette

    Negative space is especially useful in penguin logo design. Designers can shape the white belly from the dark body, create flippers through cutouts, or form a hidden letter inside the penguin’s body. This technique can make the logo feel clever and distinctive while keeping it simple.

    The silhouette should be tested carefully. A successful penguin logo should remain clear even when reduced to a small size or shown in a single color. If the mark depends too heavily on tiny facial features or decorative lines, it may fail in practical use. Strong logos often begin with a memorable outline before details are added.

    Image not found in postmeta

    Industries That Can Benefit from a Penguin Logo

    Penguin logos can appear in many industries because the symbol is flexible and emotionally accessible. In education, a penguin can represent curiosity, friendliness, and guided learning. In technology, it can suggest clever systems, stability, and user-friendly design. In childcare and family services, it communicates care and warmth. In outdoor or travel branding, it can point toward adventure, polar regions, and discovery.

    Food and beverage brands can also use penguins effectively, especially for frozen desserts, cold drinks, seafood, or winter-themed products. Apparel and lifestyle brands may use penguins for their tuxedo-like elegance, creating a stylish and memorable identity. Environmental groups may use penguins as ambassadors for climate responsibility and ocean conservation.

    Key Principles for an Effective Penguin Logo

    A strong penguin logo should be simple, distinctive, and aligned with the brand’s purpose. It should avoid unnecessary complexity and focus on a clear concept. The design should also be flexible enough to work across different media and sizes.

    • Keep the form recognizable: The penguin’s body, belly, beak, and posture should be easy to identify.
    • Match the tone to the audience: A children’s brand may need charm, while a finance brand may need restraint.
    • Use contrast wisely: Black-and-white structure can create strong visual impact.
    • Design for scalability: The logo should remain legible on both large signs and small app icons.
    • Avoid generic cuteness: The logo should have a unique feature, gesture, shape, or visual idea.
    • Consider the full identity: Colors, typography, patterns, icons, and brand voice should support the penguin concept.

    Conclusion

    Penguin logo design is effective because it combines emotional warmth with visual simplicity. The penguin can be playful or polished, humorous or refined, youthful or professional. Its symbolism of resilience, cooperation, adaptability, and quiet confidence gives brands a rich foundation for storytelling.

    For a logo to succeed, the penguin should not be used merely because it is cute. It should serve a strategic purpose and reflect the brand’s values. When shape, symbolism, typography, and color work together, a penguin logo can become a memorable identity that feels both distinctive and deeply approachable.

    FAQ

    What does a penguin symbolize in logo design?
    A penguin can symbolize resilience, teamwork, loyalty, intelligence, friendliness, and adaptability. Its natural social behavior and survival in harsh climates make it a meaningful brand symbol.
    What types of businesses can use a penguin logo?
    Penguin logos can work for education brands, tech companies, children’s products, environmental groups, travel businesses, frozen food brands, apparel labels, and family-focused services.
    Is a penguin logo suitable for a professional brand?
    Yes. A penguin logo can look professional when designed with clean shapes, balanced proportions, refined typography, and a restrained color palette.
    What colors work best for a penguin logo?
    Black, white, orange, and yellow are traditional choices. Blue, teal, navy, gold, and pastel tones can also work depending on the brand personality and industry.
    Should a penguin logo be realistic or cartoon-like?
    The style should match the brand. A cartoon penguin suits playful or child-oriented brands, while a minimalist or geometric penguin is better for modern, premium, or technology-focused identities.
    What makes a penguin logo memorable?
    A memorable penguin logo usually has a strong silhouette, simple shapes, clear contrast, and one distinctive feature, such as a unique pose, expression, hidden symbol, or custom typography.
  • 25 Amplifier Logo Ideas for Audio Brands and Music Businesses

    25 Amplifier Logo Ideas for Audio Brands and Music Businesses

    Amplifier logos are loud little symbols. They can sell power, warmth, rhythm, and style in one quick glance. A great logo can make an audio brand feel premium. It can make a music business feel alive. Best of all, it does not need to be complex.

    TLDR: A strong amplifier logo should feel bold, clear, and easy to remember. Use shapes from amps, speakers, knobs, cables, waves, and music gear. Pick a style that matches your brand voice, such as vintage, modern, playful, or luxury. Below are 25 fun amplifier logo ideas to help audio brands and music businesses turn up the volume.

    Why Amplifier Logos Matter

    An amplifier is more than a box with knobs. It is a symbol of sound. It means energy. It means control. It means music that can fill a room.

    For audio brands, a logo must do a lot of work. It may appear on gear, packaging, websites, shirts, picks, pedals, and social media. So it needs to look good big and small. It should be simple enough to stamp on metal. It should also feel exciting enough to catch attention.

    The best amplifier logos often use strong shapes, clear icons, and smart details. Think speaker circles. Think glowing tubes. Think sound waves. Think knobs turned all the way up.

    Image not found in postmeta

    1. The Classic Amp Box

    Start with the most direct idea. Use a simple rectangle that looks like a guitar amplifier. Add a speaker grille. Add two or three tiny knobs. Keep the shape clean.

    This idea works well for guitar shops, amp makers, repair studios, and live sound brands. It says, “We know gear.”

    2. Amp With Sound Waves

    Add curved sound waves coming from an amp icon. This makes the logo feel active. It looks like the music is moving out into the world.

    Use thick lines for a strong brand. Use thin lines for a more modern feel.

    3. Knob Turned to Eleven

    This one is fun. Create a logo around a control knob. Put the pointer past the highest number. Add the number 11 for humor and attitude.

    It is great for rock brands, rehearsal spaces, pedal makers, and edgy music merch.

    4. Speaker Cone Badge

    Make the speaker cone the hero. Use circles, rings, and a center dot. Place the brand name around it like a badge.

    This style feels balanced. It also looks great on stickers, drum cases, and apparel.

    5. Vintage Tube Amp Logo

    Vacuum tubes have a warm, glowing look. They feel old school and premium. Draw a small tube shape with a glow line inside.

    This logo idea is perfect for boutique amp builders, hi fi brands, and warm analog sound companies.

    6. Lightning Bolt Amp

    Add a lightning bolt through the amp shape. This gives the logo power right away. It says fast, loud, and electric.

    Use sharp angles. Use bold color. Yellow, black, red, and white all work well here.

    7. Minimal Line Amp

    Sometimes less is louder. Use one thin line to draw the amp body, knobs, and speaker. Keep it very clean.

    This works well for modern audio startups, music apps, and sleek studio brands.

    8. Amp and Guitar Pick

    Combine an amplifier with a guitar pick shape. The pick can hold the amp icon inside it. Or the amp can use a pick as its speaker grille.

    This is a smart fit for guitar teachers, music stores, and rock lesson brands.

    9. Monogram With Amp Details

    Use the first letter of the brand name. Then add amp details to it. A letter A can look like a speaker cabinet. A letter M can have knob dots on top.

    This makes the logo feel custom. It is simple, but still unique.

    10. Retro Script With Amp Icon

    Pair a small amp drawing with a smooth script wordmark. This gives a vintage sign feel. It can look like a 1950s music shop or a classic blues club.

    Use cream, brown, gold, or faded red for extra retro charm.

    11. Stack of Amps

    Draw two or three amp cabinets stacked high. This logo feels huge. It feels like a stage before a rock show.

    Keep the stack simple. Too many tiny details can get messy.

    Image not found in postmeta

    12. Amp as a Crown

    Give the amplifier a royal twist. Add a crown shape on top. Or turn the top edge of the amp into crown points.

    This is great for brands that want to feel premium. It says, “king of tone” or “queen of volume.”

    13. Shield Logo With Speaker

    Put a speaker or amp inside a shield. This makes the brand feel strong and trusted. It also has a nice merchandise look.

    Use this for sound protection gear, pro audio companies, touring services, and equipment rental brands.

    14. Amp With Headphones

    Wrap headphones around a small amp. This links live sound with personal listening. It is friendly and easy to understand.

    This logo works for music schools, podcast studios, headphone brands, and audio education businesses.

    15. Sound Wave Wordmark

    Use the brand name as the main logo. Then turn one letter into a waveform. For example, the crossbar of an A can become a wave. The middle of an O can become a speaker.

    This keeps the logo clean. It also avoids using a separate icon.

    16. Fire and Amp Logo

    Add flames behind or around the amplifier. This feels hot, loud, and exciting. It is a classic choice for rock, metal, and live music brands.

    Make sure the fire is simple. A few flame shapes are enough.

    17. Amp With City Skyline

    Turn the top of an amp into a city skyline. This adds place and personality. It can show that your brand belongs to a local music scene.

    This is a great idea for venues, local studios, and regional festivals.

    18. Circular Vinyl Amp Logo

    Mix an amplifier with a vinyl record. Use a circle as the speaker. Add record grooves around it. The result feels musical and timeless.

    This works well for record shops, DJs, audio collectors, and analog gear brands.

    19. Amp Plug Icon

    Use a cable plug as the main shape. Then add small amp features near the plug end. It can feel clever and compact.

    This style is perfect for repair services, cable brands, session studios, and audio tech companies.

    20. Cute Character Amp

    Give the amplifier a face. Add eyes, a smile, and little legs. Make it look like a happy mascot.

    This is a fun choice for kids’ music schools, beginner guitar lessons, and friendly music content brands.

    Image not found in postmeta

    21. Luxury Gold Amp Mark

    Use a simple amp icon in gold, black, or deep navy. Keep the lines smooth. Add graceful spacing in the letters.

    This logo style feels high end. It suits premium hi fi brands, custom amp builders, and upscale studios.

    22. Waveform Inside the Cabinet

    Draw an amp cabinet. Then place a waveform inside the speaker grille area. It looks technical but still musical.

    This is useful for mixing engineers, mastering studios, and digital audio brands.

    23. Broken Grille Rock Logo

    Make the speaker grille look cracked or torn. Add rough edges. Add a gritty font.

    This logo screams punk, garage, and underground shows. It should feel raw. It should not feel polished.

    24. Amp With Wings

    Add wings to the sides of the amplifier. This gives a feeling of speed, freedom, and sound flying through the air.

    It is a strong choice for touring bands, mobile DJs, live sound crews, and event brands.

    25. Abstract Sound Power Symbol

    Use simple shapes to suggest an amplifier without drawing one fully. A rectangle, a circle, and three waves can do the job. Or use a power button mixed with a speaker cone.

    This idea feels modern. It is great for apps, audio software, streaming tools, and new music tech brands.

    Logo Style Tips for Audio Brands

    Now you have ideas. But style matters too. A good amplifier logo should match the feeling of your brand.

    • For rock brands: Use bold lines, sharp shapes, red, black, and white.
    • For vintage brands: Use script fonts, cream colors, brown tones, and badge shapes.
    • For luxury audio: Use gold, black, thin lines, and lots of space.
    • For modern tech: Use simple icons, clean fonts, blue, gray, or neon accents.
    • For playful brands: Use bright colors, rounded shapes, and mascot ideas.

    Colors That Work Well

    Color can change the whole mood. An amplifier logo in black can feel strong. Red can feel loud. Gold can feel rich. Blue can feel clean and technical.

    Try these simple color mixes:

    • Black and white: Classic, bold, and easy to print.
    • Red and black: Loud, edgy, and perfect for rock.
    • Gold and navy: Premium, smooth, and refined.
    • Orange and cream: Warm, vintage, and friendly.
    • Neon green and dark gray: Modern, digital, and energetic.

    Fonts That Fit Amplifier Logos

    Fonts speak before people read the words. So choose wisely.

    • Block fonts feel powerful and reliable.
    • Script fonts feel vintage, soulful, and handmade.
    • Condensed fonts feel tall, loud, and stage ready.
    • Rounded fonts feel friendly and simple.
    • Geometric fonts feel modern and tech focused.

    Do not use too many fonts. One strong font is often enough. Two can work if they contrast well.

    Keep It Simple and Loud

    A logo does not need to show every screw, knob, tube, and cable. In fact, it should not. Too much detail can make the design hard to read.

    Think about where the logo will appear. It may be tiny on a pedal. It may be stamped on a speaker grille. It may be printed on a shirt. Simple shapes survive all those jobs.

    Here is a good test. Shrink the logo down. Can you still understand it? If yes, it is probably strong. If no, remove details.

    Final Thoughts

    An amplifier logo should feel like sound you can see. It can be clean, wild, fancy, retro, cute, or heavy. The right choice depends on your audience and your brand personality.

    Use these 25 amplifier logo ideas as a starting point. Mix them. Twist them. Turn the knobs. Add your own spark. When the design feels clear and memorable, you are on the right track.

    Great audio branding does not whisper. It knows when to turn up.

  • Coffee Donate Buttons: How Creators Monetize Through Small Contributions

    Coffee Donate Buttons: How Creators Monetize Through Small Contributions

    For many independent creators, a simple “buy me a coffee” button has become more than a cute phrase. It represents a lightweight way for audiences to show appreciation, support ongoing work, and help creators earn income without forcing subscriptions or paywalls. From writers and podcasters to open source developers, educators, illustrators, and video makers, small contributions can add up to a meaningful revenue stream.

    TLDR: Coffee donate buttons let creators receive small, voluntary payments from fans, usually as a gesture of thanks for free content or useful work. They are popular because they are simple, low pressure, and easy to add to websites, newsletters, profiles, and project pages. While they rarely replace a full business model on their own, they can help creators diversify income and build stronger community relationships.

    What Is a Coffee Donate Button?

    A coffee donate button is a small payment prompt that invites supporters to give a low-cost contribution, often framed as buying the creator a cup of coffee. The phrase makes the act feel casual, friendly, and affordable. Instead of asking for a large donation or a monthly membership, the creator is asking for a small sign of appreciation.

    These buttons usually appear on a creator’s website, blog, newsletter, podcast page, social media profile, app, or project documentation. When a supporter clicks the button, they are taken to a payment page where they can send a small amount of money. Some platforms allow one-time tips, recurring support, membership tiers, messages, and even digital rewards.

    The appeal lies in the simplicity. A reader who enjoyed an article, a listener who learned from a podcast episode, or a developer who benefited from free software can quickly say thank you with a few dollars. The creator does not need to launch a full store, manage complicated invoices, or build a subscription system from scratch.

    Image not found in postmeta

    Why Small Contributions Matter

    At first glance, a few dollars may not seem like much. However, the economics of creator income often depend on combining several small streams. Advertising, sponsorships, affiliate links, merchandise, digital products, memberships, and donations can all work together. Coffee buttons fit neatly into this mix because they are easy for audiences to understand and low effort for creators to maintain.

    Small contributions can help cover expenses such as:

    • Website hosting and domain renewals
    • Software subscriptions for editing, design, writing, or analytics
    • Equipment such as microphones, cameras, lights, and tablets
    • Research materials, books, courses, and data access
    • Time spent creating free articles, videos, tools, or tutorials

    For creators who publish free content, these contributions can also provide emotional validation. A supporter’s payment often arrives with a note, such as “this helped me a lot” or “please keep making these guides.” That feedback can be highly motivating, especially for creators working independently.

    Why Audiences Like Coffee Donate Buttons

    Audiences often prefer flexible support options. Not every fan wants to commit to a monthly subscription, buy merchandise, or sit through advertisements. A coffee button gives them a way to contribute without a long-term obligation. The transaction feels personal and direct.

    The psychology behind the phrase is also important. “Donate” can sound formal or charitable, while “buy a coffee” feels warm and everyday. It suggests that the supporter is not simply paying for content but encouraging the person behind it. This sense of human connection is one reason coffee buttons work well for creators with loyal, niche audiences.

    Supporters may also appreciate that their money goes more directly to the creator. While platforms usually charge processing fees, the contribution still feels more personal than revenue generated through anonymous ad impressions. A reader might ignore banner ads but happily pay a few dollars after a helpful article solved a problem.

    How Creators Use Coffee Buttons

    Different creators use coffee donate buttons in different ways. A blogger might place one at the end of each article with a short message, such as “If this guide helped, consider buying the author a coffee.” A software developer might include a button in a project’s documentation to support maintenance. A podcaster might mention the button during episodes and link it in show notes.

    Common placements include:

    1. At the end of free content, where the audience has just received value.
    2. In a website sidebar, making it visible without interrupting the reading experience.
    3. On a creator profile page, alongside social links and contact details.
    4. Inside newsletters, especially after helpful tips, essays, or curated resources.
    5. On open source project pages, where users can support ongoing updates.

    The most effective creators usually avoid sounding desperate or demanding. Instead, they frame the button as an optional gesture. The message might explain what contributions help fund, such as better tools, more tutorials, or continued free access.

    The Role of Trust and Transparency

    Trust is central to donation-based monetization. If audiences believe a creator consistently provides value, they are more likely to contribute. Transparency can strengthen that trust. A creator may explain that coffee donations fund hosting bills, editing time, community resources, or the development of new content.

    Some creators publish occasional updates about how support has helped. For example, a newsletter writer might say that reader contributions paid for a research database. A video creator might thank supporters for helping purchase a better microphone. These messages remind audiences that small payments have real impact.

    However, creators should be careful not to overstate earnings or promise more than they can deliver. Coffee buttons are best treated as voluntary support, not as a guaranteed exchange. If rewards are offered, such as bonus posts or shout-outs, they should be manageable and clearly described.

    Image not found in postmeta

    Benefits for Creators

    Coffee donate buttons offer several advantages, especially for creators who are still building an audience or experimenting with monetization.

    • Low barrier to entry: A creator can set up a button quickly and start accepting support without building a complex payment system.
    • No need for a paywall: Content can remain free and accessible while still generating income.
    • Audience-friendly: Supporters can contribute when they want, at an amount that feels comfortable.
    • Community building: Each contribution can create a moment of connection between creator and supporter.
    • Income diversification: Donations can complement ads, sponsorships, products, consulting, or memberships.

    For niche creators, this model can be especially useful. A highly specialized tutorial site may never attract millions of visitors, but five hundred dedicated readers could still provide meaningful support. In some cases, a smaller audience with strong loyalty is more valuable than a large audience with little engagement.

    Limitations and Challenges

    Despite their usefulness, coffee donate buttons are not a magic solution. Many creators find that only a small percentage of their audience contributes. Most people consume free content without paying, even when they appreciate it. This does not mean the audience is ungrateful; it simply reflects typical online behavior.

    Another challenge is inconsistency. One month may bring several generous tips, while the next brings very little. Because of this unpredictability, creators should avoid relying solely on coffee donations for essential income. The model works better as one piece of a broader monetization strategy.

    There may also be platform fees, payment processing charges, tax obligations, and geographic limitations. Creators should understand the terms of the payment platform they use and keep records of income. A few dollars here and there can still count as taxable revenue, depending on local rules.

    Best Practices for Effective Coffee Buttons

    Creators who want to use coffee donate buttons successfully should approach them thoughtfully. The button itself is simple, but the surrounding message matters. A clear and respectful call to action often performs better than a generic button with no context.

    Useful best practices include:

    • Explain the value: The creator should briefly remind audiences what they received, such as a free guide, tool, lesson, or resource.
    • Keep the tone light: A friendly phrase can make support feel natural rather than pressured.
    • Make it visible: The button should be easy to find without overwhelming the page.
    • Offer suggested amounts: Small presets, such as the cost of one, three, or five coffees, make decisions easier.
    • Say thank you: Appreciation encourages goodwill and may lead to repeat contributions.
    • Test placement: Creators should try different locations, such as article endings, newsletter footers, or profile pages.

    A strong message might say: “This tutorial is free. If it saved time or helped solve a problem, the creator welcomes a small coffee contribution to support future guides.” This wording makes the ask clear while keeping it optional.

    Coffee Buttons Versus Memberships

    Coffee donate buttons and memberships are related but different. A coffee button usually focuses on one-time contributions, while a membership offers recurring support, often with benefits. Both can coexist. A casual fan may send a one-time tip, while a dedicated supporter may join a monthly membership later.

    Coffee buttons are often better for creators who want to minimize obligations. Memberships can create pressure to produce exclusive content, manage community spaces, or deliver perks. A coffee button, by contrast, can simply support the creator’s existing work. This makes it appealing for people who create irregularly or who want to keep their main output free.

    For mature creator businesses, the coffee button may function as a first step in the support ladder. Someone may begin with a small contribution, later subscribe to a newsletter, buy a product, attend a workshop, or become a long-term patron. In that sense, a small donation can start a deeper relationship.

    Image not found in postmeta

    Who Benefits Most from This Model?

    The creators who benefit most are usually those who provide clear, practical, or emotional value. Educational creators, independent journalists, tutorial writers, open source maintainers, artists, musicians, and community organizers can all use coffee buttons effectively. The key is that the audience recognizes the creator’s work as worth supporting.

    Creators with searchable evergreen content may do especially well over time. A helpful article or tool can continue attracting visitors for years, and each visitor represents a potential supporter. Meanwhile, creators with strong personal brands may benefit because fans want to encourage the individual, not just the content.

    The Future of Small Contributions

    As online audiences become more comfortable with direct creator support, small contribution models are likely to remain important. People increasingly understand that free content is not truly free to create. It takes time, skill, tools, and persistence. Coffee donate buttons give audiences a simple way to participate in sustaining the work they value.

    For creators, the opportunity is not only financial. These buttons can reveal which content resonates most deeply, identify loyal supporters, and strengthen the connection between creator and community. When used with transparency and respect, a humble coffee button can become a meaningful part of a creator’s monetization strategy.

    FAQ

    What is a coffee donate button?

    A coffee donate button is a payment button that lets supporters send a small voluntary contribution to a creator, often described as buying them a coffee. It is commonly used on websites, newsletters, podcasts, and project pages.

    Do coffee donate buttons make significant money?

    They can, but results vary widely. For most creators, coffee donations are a supplemental income stream rather than a full-time income source. They work best when combined with other monetization methods.

    Where should a creator place a coffee button?

    Effective locations include the end of articles, newsletter footers, podcast show notes, website sidebars, creator profile pages, and open source documentation. The best placement is usually where the audience has just received value.

    Are coffee donations better than subscriptions?

    They serve different purposes. Coffee donations are flexible and low pressure, while subscriptions provide recurring revenue and may include ongoing benefits. Many creators use both.

    Should creators offer rewards for coffee donations?

    Rewards are optional. Some creators offer thank-you notes, shout-outs, or bonus content, while others keep the contribution purely voluntary. If rewards are offered, they should be simple and sustainable.

    Do creators need a large audience for coffee buttons to work?

    Not necessarily. A small but loyal audience can be more supportive than a large passive audience. The most important factor is whether people feel genuine value from the creator’s work.

    Are coffee donations taxable?

    In many places, creator donations or tips may count as taxable income. Creators should track payments and consult local tax guidance or a qualified professional when needed.